Friday, August 30, 2013

Back to School Rainbow Cheetah Nails


Happy Labor Day Weekend! I will be showing you guys how to achieve a Cheetah design with rainbow spots. I hope you guys enjoy this! This is great look if your heading back to school and would like your hands to stand out :)


You will need a rainbow of colors for the spots

These are the 3 shapes I  created with a permanent marker for the Cheetah look.
Top Left: Sideway smiley face or a 'C' with 2 vertical dots
Top Right: Eye shape or open almond
Bottom Left: Open backward letter 'C'


 Fill in the space of each Cheetah spot with a color - I used highlighters for this larger demonstration.


Start with a white base coat. This is "White on White" by China Glaze.


Use a permanent marker to draw "smiley faces", open almonds, and "C's"


Fill in the open spaces with a colored polish


You should end up with something like this


Can you tell that I used a topcoat here? XD


 OPTIONAL


Add Glitter!!


It's difficult to photograph the effect of glitter-it doesn't photo as clean but adds tons of sparkle in person

Thanks for looking!!


Monday, August 26, 2013

Princess Nails :D

Yay! I have 20 followers. Thanks to each one of you! 

I used my cousin as a hand model again. She's a mom of two and unfortunately messes up her nails right after I paint them because she cooks every meal from scratch and cleans. (So far, every person who asks me to paint their nails messes them up right after which is frustrating to me -_-)  I took some photos of her hands before she went to work. I'll have to use a  stronger top coat on her next time. She also has dry cuticles that I would love to hack off XD but she doesn't have the patience. This particular experience has inspired me to do a future blog on supplies that every nail fanatic should have in their collection so stay tuned :).


        Left: Peach Pave ( http://www.amazon.com/Sally-Hansen-Diamnd-Strenght-Peach/dp/B004PH002C)
Right: Strobe Light (http://www.target.com/p/sally-hansen-xtreme-wear-nail-color-strobe-light/-/A-13332911)
Doesn't this remind you of a fair tale?

Basic frosty pink base with glittery tips


I love glitter! Bling bling XD


I want your advice! Should I create names for my designs (Ex: Princess Nails) or should I use descriptions (Red Polish with Gold Fakies)? What do you prefer?

Saturday, August 24, 2013

Red Polish With Gold Flakies


 Hey There Pretty,


Thanks for returning to view my site :D This is a red look with gold flakies. I LOVE flaky nail polish. The chunky, multi-size glitter and angle-changing colors have captured my interest with a death grip. I don't have many in my collection so I'm looking to expand.

I used "Watermelon" by Essie (http://www.amazon.com/Essie-Nail-Polish-Colours-Watermelon/dp/B0006PLNAU)  and "Luke and Lush" by China Glaze (http://www.amazon.com/China-Glaze-Lacquer-Fluid-Ounce/dp/B009KW3BT6).


This is "Watermelon" by Essie. I love this red polish! It has a coral base which makes it a lighter shade of red with a hint of pink hues.


Start off with a solid coat of "Watermelon" by Essie
This color is so glossy that it pass as a "jelly" polish

This is "Luke and Lush" by China Glaze. This is a gold flakie top coat.


Paint half of your nails with "Luke & Lush. I chose to paint only half the nail so the gold flakies don't overshadow the red base coat.


Red and Gold remind me of Chinese New Year :D

Friday, August 23, 2013

Silver Magnetic Nails

Hello again :]

Yay! New nail post! This time I used "Silver Elements" by Sally Hansen (http://www.amazon.com/Sally-Hansen-Magnetic-Elements-Silver-Elements/dp/B0083Y9L3W). This is a easy way to get a design on your nails without much talent or work. I recommend this for nail art newbies :D The directions were easy to follow and  results were instantaneous!

Step 1: Paint a base coat
Step 2: Paint a 2nd coat
Step 3: Hold the provided magnet above second coat before it dries


First base coat


Finished effect


I hope you try this out :)

Wednesday, August 21, 2013

Prevent your nails from chipping

Hey hey hey!


%$^&$^@#$. I just chipped two nails because I thought it was a good idea to go 'bare'. (I'll show you how to mend a broken nail another time.)

Here's a secret...to prevent your nails from chipping. 
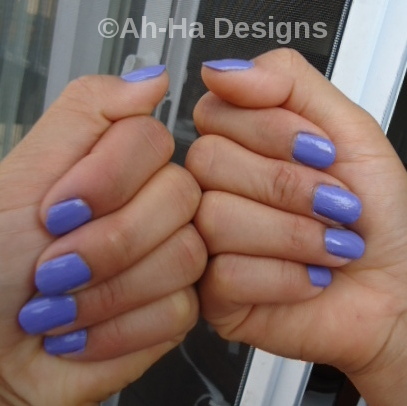
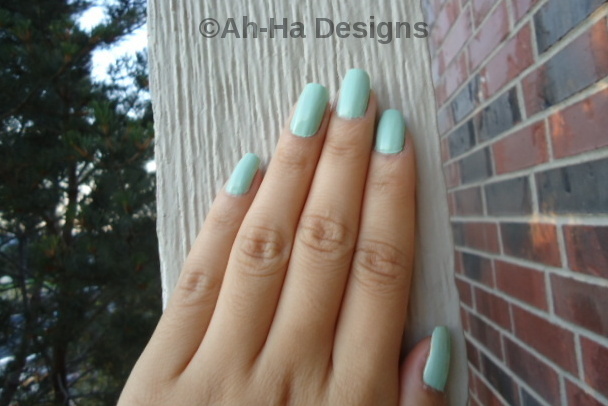
Always have a coat of nail polish on them. Nail polish acts as a shield to prevent direct damage to the nail. It also adds a extra layer of thickness to your nails.

Short or long, you'll find a benefit to nail polish.

Short Nails: Nail polish will help your nails grow by adding protection and strength while it has a chance to grow out.
Long Nails: The added thickness of nail polish will prevent your nails from chipping or breaking off. Nail polish will help maintain the length by adding buoyancy from everyday nail contact.

When I say 'nail polish' I mean with a hue of color-any shade. A clear base coat will not be sufficient enough. Have a full coat of polish on each nail at all times. When the polish starts to chip, your natural nails are expose and are no longer protected. Plus, having a fresh manicure will encourage you to not mess up your nails and prevent you from biting your nails.

My Experience: I started growing out my nails in middle school. I was a bitter. When my nails were bitten raw to the skin, I would stare at how ugly they were and continue biting. The blood and pain would attract my attention at all times of the day and the woodchuck in me was awakened. XD. However, when my nails were painted, I didn't care how my nails looked because they were polished and somewhat presentable. I would forget to look at them (and feel the urge to chomp) and they started to grow!!

I hope this helps. I'll be posting a new nail blog this weekend :D

Always,
Amy :]

Saturday, August 17, 2013

Periwinkle Nails :D


Hello again! This is "Boxer Shorts" by Essie. I used a model this time. My cousin's wife wanted a new manicure so I agreed to help her out in exchange for being a hand model :) This color is a nice mix between purple and blue. Essie polishes are very glossy and long lasting so I skipped the top coat.


The lighting in this photo is awful but I wanted you to see what the Essie bottle looked like.


I hope you enjoyed what you saw :D

Mint Sorbet By Sally Hansen

Hey! This is 'Mint Sorbet' by Sally Hansen. You can find this color at your local drugstore for $2.50. What a steal! I love Sally Hansen. This light pastel green is stunning!


Thanks for viewing my blog :)