Wednesday, October 30, 2013

'Holly Day' by China Glaze

Hi! I will be starting a series of solid darker colors to accommodate the autumn weather. This is 'Holly Day' by China Glaze. This is a lovely forest green. I've also received a compliment calling it a rich money green :D This green looks dark green in the sunlight but is a deep dark green-almost black in indoor lighting. I hope you enjoy

'Holly Day' by China Glaze

Forest Green!

Money Green!

Perfect shade for fall!

Almost green-black in indoor lighting. Still lovely!


Isn't it really pretty?

Monday, October 28, 2013

'Dark Room' by Sephora OPI

Hello! This is 'Dark Room' by Sephora OPI. This is a charcoal grey color-pefect for fall! I've gotten many compliments on this hue. This color is very earthy and I was comfortable enough to wear this to work :D 

Dark Charcoal color


Has a blue tint here :D

Grey :)

Thanks for looking!

Saturday, October 19, 2013

Pumpkin Faces :D

Hi There! 12 more days until Halloween :) For this design, I did different pumpkin faces. Please scroll down to view photos :D
Start with a orange base coat
Use a permanent marker to draw pumpkin faces!

Basic triangle eyes, nose and mouth :D

The most basic pumpkin shapes are circles and triangles 

Be as creative as you'd like

Thanks for looking!


Sunday, October 13, 2013

Bloody Eyeballs

Hi there! Thanks for visiting my page! Continuing the Halloween theme, I did a bright red eye ball design! I hope you enjoy what you see :D
Scroll down to view this tutorial!


On your middle & ring finger create a circle with blue polish for the eye ball. Use a thin brush to create letter "Y's" X's" and "V's" for the red veins.

On your thumb, index and pinky finger create a red splatter effect for blood. Created by lines and dots.

You should have bloody nails and a blue eye ball with red veins 

Lastly, add a black circle inside of the blue circle for the pupil. Add a white circle in the bottom right of the black circle for a glare effect.

Tada! Bloody eyeball nails :D


Thanks for looking. Happy Halloween!

Saturday, October 12, 2013

Bright Slime Green Frankenstein Nails

Hi There :D Getting back to Halloween spirit, I concocted this bright slime green design with Frankenstein as an embellishment! Thanks for looking!
Please view the photo tutorial below to achieve this :D

Start with a bright green and a yellow-green on your ring finger

Place Scotch tape horizontally & vertically to  create a guide for the black squares

Square guides

Remove the tape. Use the black squares & extend lines to create a border for your other squares
Fill in the upper left corner with black polish

Create triangles for the hair and a barb wire

Add white circles for the eyes, and barbed wire for Frankenstein's mouth

Add green rhinestones for the eyeballs


Complete look!


Spooky!

Thanks for looking!

Tuesday, October 8, 2013

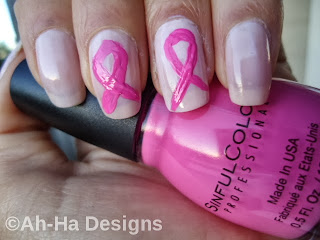
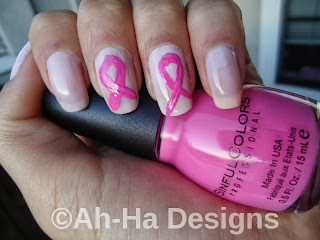
Pink Ribbon Breast Cancer Awareness

Hi Hi! October is Breast Cancer Awareness month so I thought I'd do pink ribbon nails . This is a easy 2 stroke design. I hope you like it!


Start with a natural base coat.

This is my 1st ribbon created on my middle finger


Start with a upward slash 

Add a hook to your slash to create candy cane like shape

Lastly, extend the hook downwards towards the opposite edge of your nail


All finished!

"Fight like a girl"

Keep the hope alive!

Sunday, October 6, 2013

Mustache Nails!

Hey there! I did mustache nails this week! This is a nude look with a hipster mustache. I hope you like what you see :D 


Start with a beige base


Use a black permanent marker to draw 2 circles and a make a curve from the inner circle extending out to the edge of your nail

Now use a black polish to trace the black circles and fill in the space between the curvatures 


Now you're instantly hip :) haha


Thanks for looking!